The Materials You Need to Land Press & How to Organize Them

When it comes to being successful at doing your own PR, organization is key. Knowing what materials editors need and having them organized in advance will set you up for success and save you time in the long run.
This might not be the most exciting aspect of PR, but it’s essential! We are sharing our insider tips for the materials you need and how to organize them below.
Step 1: Gather Your Materials
Let’s review the key materials you will need to get started. These will vary slightly across industries.
About page: a one-page document outlining the who, what, when, where, and why of your company
Bio: an overview of your background and why you started your company, with a few personal details (this can be a few sentences or a few paragraphs)
Line Sheet: images, pricing and key details for product collections
FAQ Page: key details about your business or a collection
Product photography: Lay flats of your product on a white seamless background
Lifestyle photography: Images that bring your product or service to life by showing them in use
Headshot: Professional photo of the founder or expert styled in a way that is relevant to the brand. Ex// if you’re an artist take your headshot in our studio or a gallery space
We provide plug-and-play templates for an About Page, Bio, and Fact Sheet and provide specific guidance on PR photography in our online course The Brand Starter Kit.
Step 2: Organize Into Folders
Once you have gathered your essential materials the next step is organizing your digital files. Having all your PR materials in one easy to access place will allow you to respond quickly to opportunities as your business grows and you start receiving incoming requests from editors and potential partners.
We suggest you create the following folders:
Internal folder – This can be a Dropbox, Google Drive or even a desktop folder, and is just privy to yourself and your internal team. This will include reference documents that you and your team can access repeatedly.
Save the following in your internal folder:
Audience Personas
Messaging Framework
Tone of Voice Guidelines
Mood Board
Style Guide (color codes, fonts, logos)
2. External Folder – This folder will hold finalized images, assets and documents that you and your team will send to editors, influencers, potential partners, and anyone outside of your organization.
Save the following in your external folder:
About page
Bio
Fact sheet
Line Sheets
Image library (see details below)
High res company logos
Step 3: Create an Image Library
While having an About page and Bio is very important, it can be a deal breaker for editors to cover your brand if you are not able to provide photography. Publications often rely on brand images for their stories, especially for digital articles.
We are listing out the most important images to have on hand below. These can be organized into an Image Library folder within your master External Folder.
There is a wide range of materials you may need based on your industry, but here are the essentials:
Company logos - You will need to have these easily accessible for any media requests and for creating brand documents.
*Pro tip: save your logo as a JPEG, PNG (transparent background) and also as a PDF for print needs.
Headshots - If you have the budget, we highly recommend hiring a photographer who specializes in lifestyle or portrait headshots. These images will be used on your website, LinkedIn, social media channels, and also for interview and speaking opportunities. You want your headshot to reflect your area of expertise and industry.
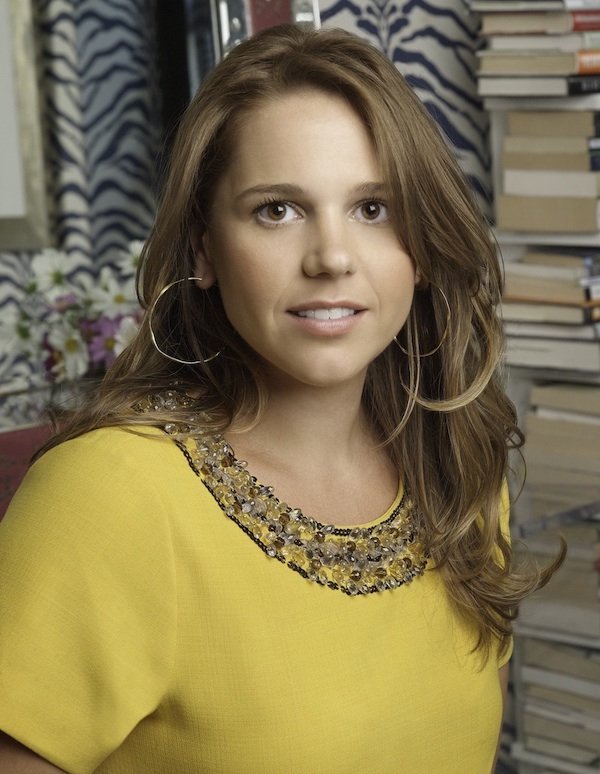
Interior Designer Elizabeth Bauer
Product Photography
For products, it’s important to have images of items on a white seamless background. These are often referred to as flats or silos and are used for line sheets, your website and are often requested by editors for product round ups. Flats can be saved in JPG, PNG (transparent background), and PDF.
If you have budget to outsource product photography, we recommend looking into Soona.
If you do not have the budget for a product photographer, you can purchase an inexpensive light box from Amazon, or you can set up a white seamless background at home. There are also apps available for background removal. Canva allows you to remove the background from photos, and the Adobe Express app also offers free background removal.

flat product image courtesy of MIRTH
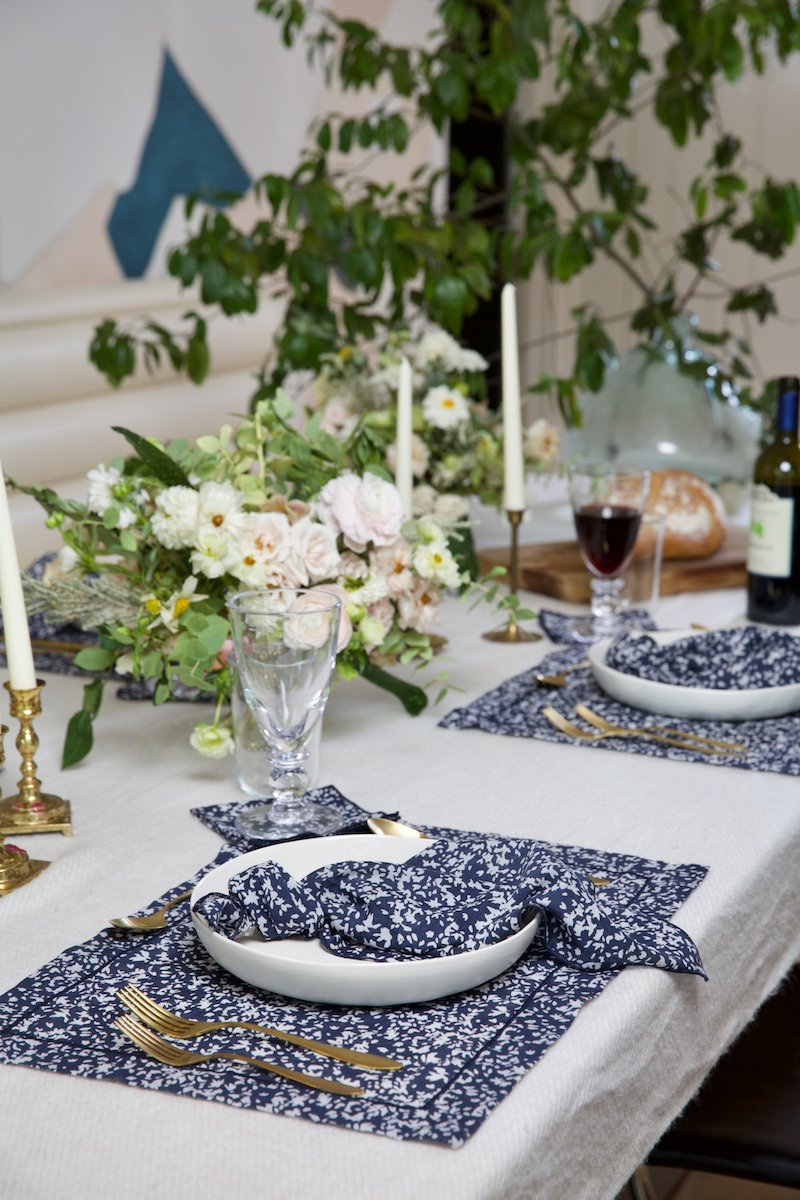
Lifestyle photography:
These are images that bring your product or service to life and show your audience your products in use. For example, if you are shooting a line of summer table linens, you could create a summer tablescape with dinnerware, food and flowers. These photos will be used on your website as well as your social media channels to bring your product/service and brand to life.
You do not need to hire a photographer if there is no room in the budget, just make sure you are utilizing good lighting and use an editing app, like VSCO or Canva.
*Pro Tip: Remember you are selling YOUR product or service. Do not get carried away with excessive props and lighting. Keep the props to a tasteful minimum and focus on natural lighting. Your product should be the focus.
Here is an example of a lifestyle photo for MIRTH, a brand we work with that sells womenswear and lifestyle accessories ethically made by artisans.
lifestyle photo courtesy of MIRTH / Jenny Antill
Here is a lifestyle photo for a service-based business we have worked with called KB Design HTX. The owner Kelly Broesche welds permanent jewelry.

lifestyle photo courtesy of KB Design HTX
For plug-and-play PR materials templates, image guidelines, and additional guidance on organization your materials, be sure to take our online course The Brand Starter Kit.